How To Make A Sneaker Cleaning Solution
Sneaker enthusiasts understand the importance of keeping their beloved kicks looking fresh and clean. While there are numerous commercial sneaker cleaning products available, you can also create an effective DIY sneaker cleaning solution using readily available household items.

How To Make A Sneaker Cleaning Solution
Sneaker enthusiasts understand the importance of keeping their beloved kicks looking fresh and clean. While there are numerous commercial sneaker cleaning products available, you can also create an effective DIY sneaker cleaning solution using readily available household items. In this article, we'll guide you through the process of making your homemade sneaker cleaning solution that's both budget-friendly and environmentally conscious.
Ingredients You'll Need:
-
Warm Water: Warm water is essential for breaking down dirt and stains effectively.
-
Dish Soap: Mild dish soap is gentle on various sneaker materials and works well as a cleaning agent.
-
Baking Soda: Baking soda acts as a natural abrasive, helping to scrub away tough stains and odors.
-
Soft-Bristled Brush: A soft-bristled brush, such as an old toothbrush or a dedicated shoe brush, is ideal for scrubbing without damaging the shoe's surface.
-
A Bowl or Container: You'll need a container to mix your cleaning solution.
Steps to Create Your DIY Sneaker Cleaning Solution:
Step 1: Gather Your Supplies
- Collect all the necessary ingredients and tools listed above to ensure a smooth cleaning process.
Step 2: Prepare the Cleaning Solution
- Start by filling a bowl or container with warm water. The water should be comfortably warm but not scalding.
- Add a small amount of mild dish soap to the warm water. A teaspoon of soap for every cup of water should suffice.
- Optionally, you can add a tablespoon of baking soda to the mixture. Baking soda helps with stain removal and odor control.
Step 3: Mix Thoroughly
- Use a spoon or your finger to mix the ingredients thoroughly until the soap and baking soda dissolve into the water. You should have a soapy, sudsy solution.
Step 4: Test in a Hidden Area
- Before applying the solution to your sneakers, perform a patch test in an inconspicuous area to ensure it doesn't cause any adverse effects or discoloration.
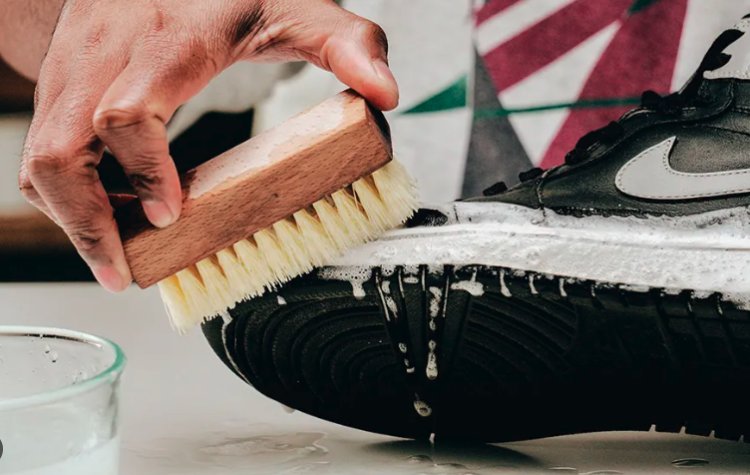
Step 5: Begin Cleaning
- Dip your soft-bristled brush into the cleaning solution, allowing it to absorb some soapy water.
- Gently scrub your sneakers in a circular motion, paying extra attention to stained or soiled areas.
- For tough stains, you can apply more pressure, but be cautious not to damage the shoe's surface.
- Rinse the brush frequently in the cleaning solution to prevent dirt buildup on the brush itself.
Step 6: Rinse and Dry
- After you've cleaned the sneakers to your satisfaction, rinse them with clean water to remove any soap residue.
- Pat the sneakers dry with a clean cloth or paper towel. Avoid using direct heat sources for drying.
Step 7: Air Dry
- Allow your sneakers to air dry naturally in a well-ventilated area. Stuff them with crumpled newspaper to help maintain their shape during drying.
Step 8: Final Touches
- Once your sneakers are completely dry, you can apply a sneaker protector spray to prevent future stains and maintain their cleanliness.
With a simple DIY sneaker cleaning solution made from warm water, dish soap, and baking soda, you can effectively clean your sneakers at home. This budget-friendly and environmentally conscious approach not only saves you money but also allows you to take pride in the care and maintenance of your favorite kicks. So, roll up your sleeves, follow these steps, and watch your sneakers shine like new again!
CHECK OUT THE BEST SNEAKER CLEANER PRODUCTS TO KEEP YA KICKS FRESH